We recently added new features to our autoresponder, so that this system can be used for a wide range of businesses and needs. Now, there are several ways to use the Autoresponder, but we’ll explain everything step by step. firstly, you need to create the newsletter, (or newsletters) you wish to be sent:
At this moment, you don’t need to make any specific configuration. In fact, you can simply create the message you want, the way you prefer. Once you have the newsletter ready, you
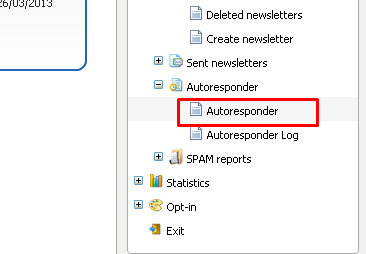
must click on “Autoresponder -> Autoresponder“, to create a new autoresponder:
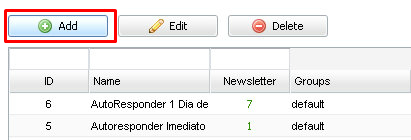
Now, click the Add button to start configuring the new autoresponder:
At this point, you’ll have several configuration options, and we will analyze them one by one.
Setting up an autoresponder with immediate response
The autoresponder with immediate response will send the selected newsletter immediately, just after the subscriber has activated the account. The configuration for this autoresponder is the following:
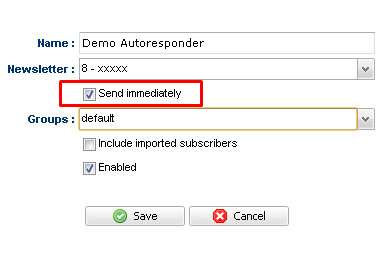
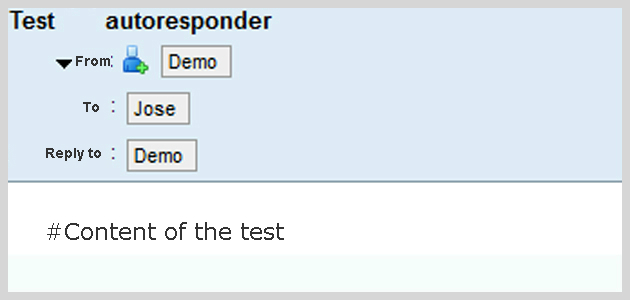
First of all, you should enter the autoresponder’s name, this name will be useful only for your internal control, so that you can identify it among all the other autoresponders. Your clients, on the other hand, will see the subject of the message, which is the subject of
the newsletter you selected, and not the autoresponder’s name. Then select one of the newsletters that you have created earlier.
Check the option to send immediately, so that the message will be sent as soon as the user has activated the subscription. You should inform to which group or groups, the user will need to sign up for the autoresponder to send the message. This is important, because you’ll have to take these groups into account when creating the subscription form on your website.
Let’s leave unchecked the option to include imported users for this example, and mark it as active.
If you had checked the option to include imported users, when you import a new file, the autoresponder would be immediately sent to all e-mails in the archive.
Once all the options are configured, save your autoresponder by clicking the Save button. With that, your autoresponder will be ready, and will appear in the autoresponder list:
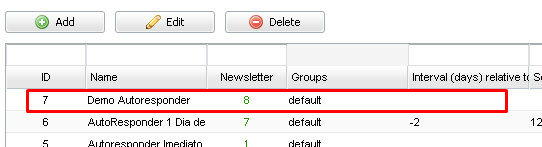
As this is an autoresponder that sends the message immediately, you don’t need to enter
any value in the fields date or time. Now, we will try this feature, imagine that you have the following form:
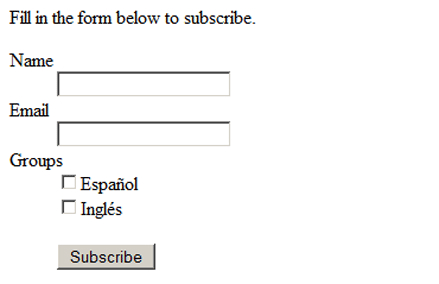
Now, fill in and submit the form with a valid account. After you submit it, you will see a confirmation page:
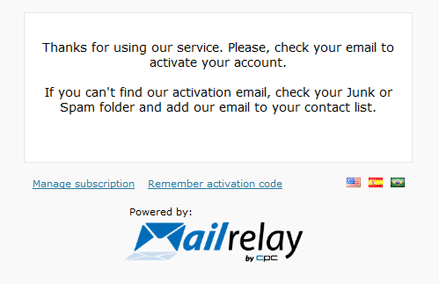
Then you will receive a message, asking you to confirm the subscription:
The subscriber will only have to click on the link ” Click here to confirm your signature”, and the account will be activated. As soon as the account is activated, the autoresponder will send the newsletter to the new user:
That is all you need to do to set up an autoresponder with immediate response.
Setting up an autoresponder with scheduled response
In this case, instead of an immediate response, you must set a period of days that the system should wait before sending the newsletter to your clients. Let’s learn how to do it using a practical example:
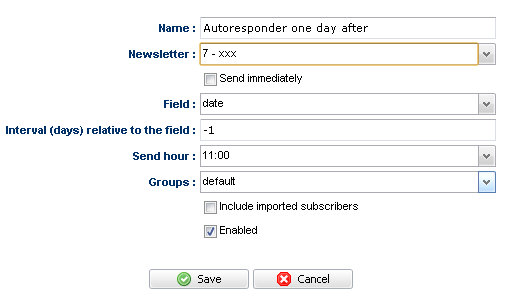
The main difference between this option and the previous autoresponder is that we didn’t check the option “Send immediately. Instead, we’ve checked the date field, so the system will use the date to know when to send the message to your subscribers.
In this example, for the field “Interval (days) relative to the field”, we’ll use -1, thereforeThe autoresponder will be triggered daily to all users who registered one day before (-1), at 12 o’clock in the morning.
If you had entered -2, the autoresponder would be triggered daily, but the system would check which users have signed up two days before, and so forth.
Where does the system searches this date field?
It’s very simple, when a user subscribes to your newsletter, the system will save the subscription date, so that the autoresponder can use that information as a trigger:

Based on this data, which in this case is 13/03/2013, a day after, (14/03/2013) the autoresponder will send the message to the subscriber. In this example, on 14/03/2013, the autoresponder would check all Users who signed up the day before (-1), and at the appointed time, 12:00, the newsletter would be sent to the autoresponder subscriber and for all the other users who signed up the day before.
Setting up an autoresponder with scheduled response with imported users
Another alternative would be to set up the autoresponder, with the inclusion of users that were imported via the import menu on the platform, one possible configuration would be the following:
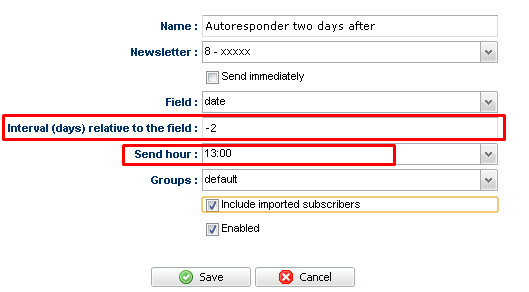
We have selected the days after signature, or after the file as been imported, in the example
we have selected two days (-2), therefore, all users who signed up in the last two days will receive the message two days after signing up. Therefore, if you import a list of subscribers today, they will receive message triggered by the autoresponder in two days.
Two important notes:
1. – Do not worry for the fact that the days are negative, this just means that the autoresponder is triggered daily, and if the value is -2, the message will be sent to all
Users who have registered two days ago.
2.- If after a few days you import these users again, the autoresponder will always use the date of first import. If you want to send it once more to the same users, the best alternative is to schedule the newsletter or create a custom date field.
The remaining values are the same as before, the time of the day you want the message to be sent, and we’ll leave the value to include imported users checked.
And now, it’s time to learn to set custom fields, and use them in the autoresponder.
Creating custom fields for your autoresponders
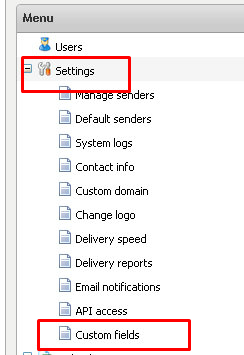
Another very useful option, is the creation of custom fields, available in the menu Settings -> Custom Fields:
To create a new custom field, simply click the Add button, which appears at the top left of the screen. You must complete the following fields:

The position is only a value indicating in which position the field will appear in the subscription form. The next option will be the title, meaning the field name, and the field type, which must be chosen from the options available. In this case, we will choose Date. With this,the new custom field is ready and you’ll only need to create the autoresponder for this field:
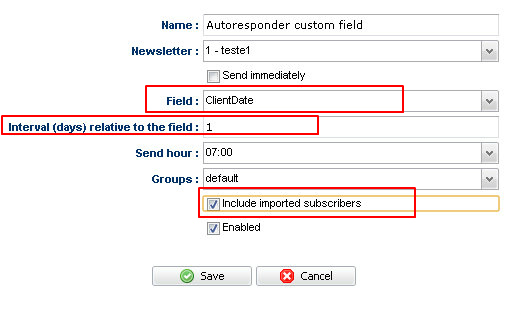
For this autoresponder, the difference is that in “Field”, you will select the custom field,
and the interval (1), or one day after the date that appears in the custom field.
How to enter values for this custom field?
First of all, you must Import the accounts, even if they already were imported before. After that, click on Import -> Advanced Import, select the file with the accounts, which should have a format similar to the following:
[email protected],demo1,2013-03-14
[email protected],demo2,2013-03-14
[email protected],demo3,2013-03-14
In this case, this file has the e-mail addresses, the subscriber’s name and a value for the date field. The import process should be configured as follows:
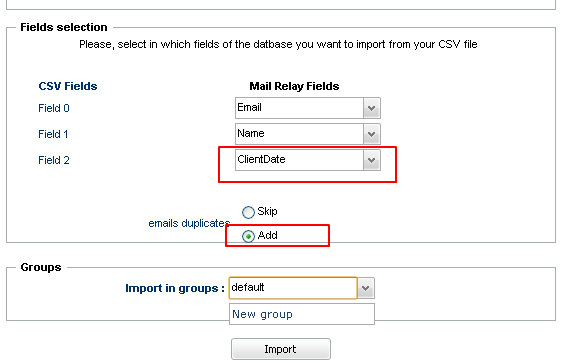
In this example, field 2 was selected as the date field, Date client. It is important to check the option to “add”, if the account already exists, and Finally, select the group to import the users to.
Thus, the autoresponder is configured correctly.
IMPORTANT
– When you create a new autoresponder, and choose the normal date field, the interval number is negative, as this indicates a date in the past.
Since the system reviews the autoresponders daily, your subscribers always will be in the past, because obviously, they have signed up in the past.
– When you create a new autoresponder and choose a custom field. You can choose to send the message after the file has been imported, you can select 0 to send the message in the date set by the custom field, or you can enter a positive number to indicate the number of days the system must wait before sending the message.
As this is a more complex subject, you can ask as many questions as necessary, by leaving a comment, and we’ll answer these questions to help you as soon as possible.