
Finally we are ready to write this article about the Bloom plugin ,
which allows you to create subscription forms with Mailrelay easily, this is very good, for two reasons:
1.- Many users have contacted us requesting information about the configuration of this plugin.
2.- The information on how to configure the plugin was sent by our colleagues from Civittas, which shows us the important community being created around Mailrelay.
To configure the plugin you only need a few steps.
1) Select to use “Custom HTML Form”
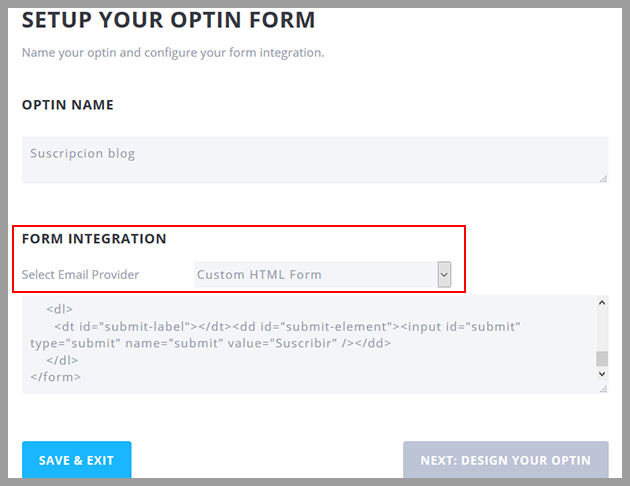
In the configuration of your form, in the option Select email provider, we will have to Select Custom HTML Form.
Below you will see a box where you must enter the code for the opt-in form.
The code can be copied from the opt-in menu Get form Code:

Or from the opt-in menu selecting the custom forms option.
The important thing is to copy and paste all the code in the box as shown in the first image.
2) Setting the other fields of the plugin

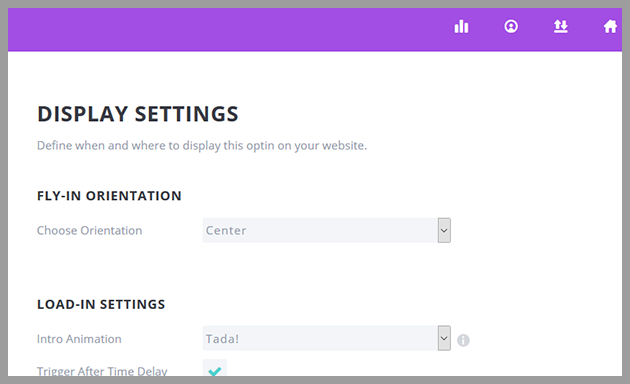
Some values may not be applied to this opt-in form.
3) Using the “Custom CSS” option to adjust the layout of the form
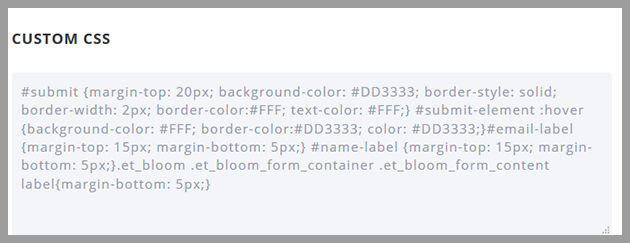
The code will vary depending on what you want and the template you are working with, but as a basis you can use the code sent by the Civittas team:
#submit {margin-top: 20px; background-color: #DD3333; border-style: solid; border-width: 2px; border-color:#FFF; text-color: #FFF;}
#submit-element :hover {background-color: #FFF; border-color:#DD3333; color: #DD3333;}
#email-label {margin-top: 15px; margin-bottom: 5px;}
#name-label {margin-top: 15px; margin-bottom: 5px;}
.et_bloom .et_bloom_form_container .et_bloom_form_content label{margin-bottom: 5px;}
4) Next, we will define when and how the plugin will display the form
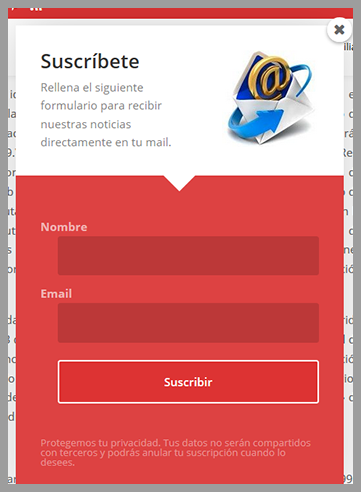
And with that we have all the necessary settings to use Bloom with Mailrelay, the result would be something like this:
I hope it will be very useful!
Finally, I would like again to thank the Civittas staff for sending the necessary information to configure the Bloom plugin with Mailrelay.