Today we would like to explain the operation of a new feature that you will surely enjoy. We believe that this new feature will be very useful in your email marketing campaigns.
This new feature is the creation of Advanced filters for segmenting your subscribers
What can you do with these filters?
You can create subgroups of subscribers, using the contacts that meet certain criteria:
– Subscriber who did not view a newsletter
-Subscriber who did not click on any link in a newsletter.
– Users who viewed a newsletter.
– Users who clicked on a link in a newsletter.
For example, you could create a new subgroup, with subscribers who have not opened your latest newsletter, with the purpose of sending the newsletter again for this group of subscribers.
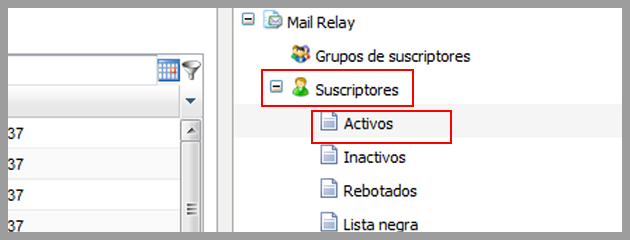
Where to find this new feature?
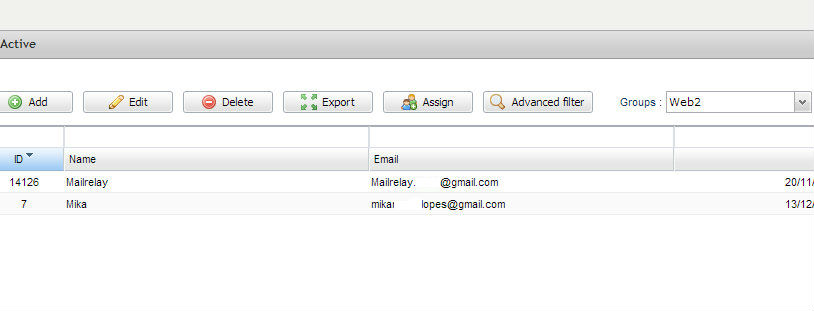
You can find it in the Menu subscribers, in most categories, for example in the Actives menu:

By accessing this menu you will see a new button, Advanced Filter:

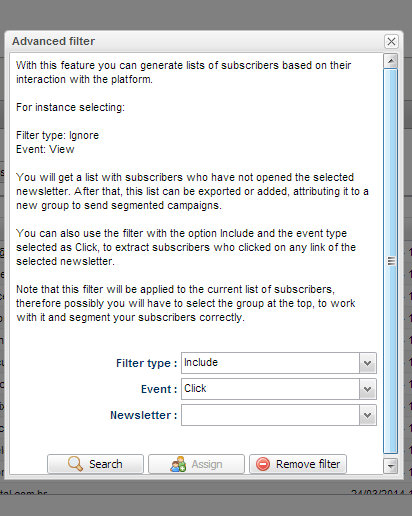
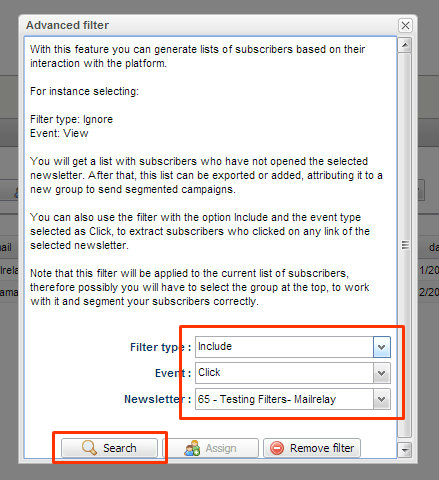
If you click this button, you will see a window like this:

What are the options?
In this window you will find a brief explanation that will surely help you create the filter you want.
Basically these options are:
1) Filter type, in this field, you have to choose between two variables, Include and Ignore. If you choose the option Ignore, the system will search for the subscribers who did not perform an action with your newsletter.
The “Include” filter works in reverse, it will search for the subscribers who performed an action with your newsletter.
2) Event, by using this field, you can define the type of event, if you want to work with clicks on the links or views.
3) Newsletter, this field allows you to select for which newsletter you wish to use the advanced filter.
WARNING
The filter will be enabled on the selected group.
For example if you are in the Subscribers->Active menu, the filter will be applied to all active subscribers.
But if you were in Subscribers->Active menu, but with one of your groups selected, this filter would be applied only on this group.
Remember that, when using the advanced filter.
How to apply the filter?
Going back to the previous image:
After selecting the options, click the Search button.
By clicking this button, the system will filter all subscribers who are within the selected parameters.
If you close the window now, the list of subscribers will include only the contacts that are within the parameters of the selected filter.
By doing this you can view these subscribers.
But if what you want to do is to create a new group, you must select the Assign button, which allows you to add subscribers to another group.
This option is especially useful if you want to send the newsletter again, or a follow-up campaign for this new group.
Finally you have the option “Remove Filter”, to redisplay all subscribers without the filter.
Let’s see an example, by really using this new functionality
We will see all the options step by step.
Suppose you just sent a newsletter, and for some reason you want to send it again to subscribers who did not open it.
The first thing you should do is to create a new group to add all subscribers who have not opened the newsletter into this group.
Click the Subscriber Groups menu and then the Create button:
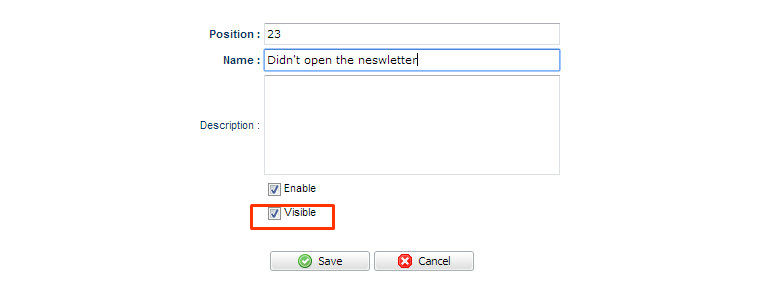
It is not necessary to mark the Visible option because this is an internal group and it does not have to appear in the subscription form.
However, the group must be active.
Now click the Subscribers menu and then click Active.
As the newsletter was sent to a group called web, we must filter the subscribers using this group:
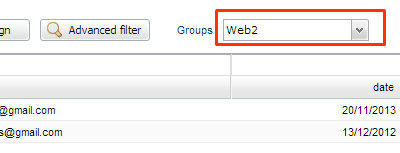
As you can see, this group has two subscribers:
You can see all subscribers who viewed the newsletters, as well as all subscribers who did not open it.
To do this, click the Advanced Filter button and the popup shown above will be displayed again.
For this example we will select:
– Filter Type -> Ignore
– Event -> View
– Newsletter -> Testing Filter.
With this, the system will filter out subscribers and leave only the ones who did not view the newsletter.
Now we will click the Search button after selecting these options:
By doing this, you will see at the bottom of the same window that the subscribers that are not within the selected parameters will have disappeared:
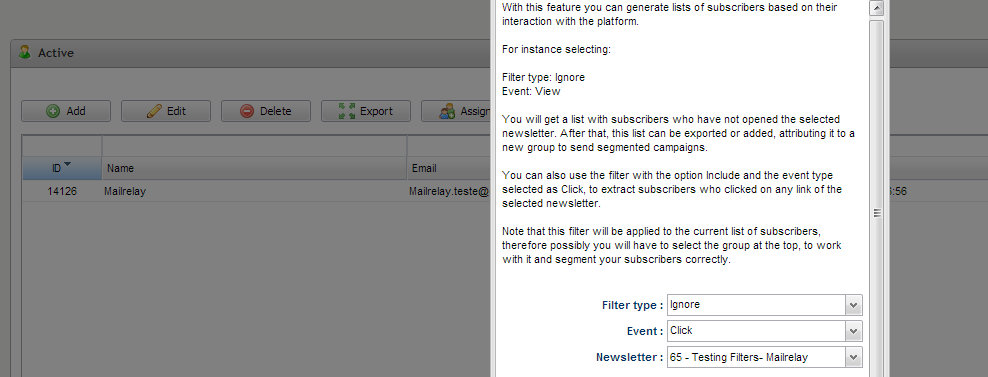
In the case of this example, the subscriber did not view this newsletter.
Lets say you would like to send it again to this user.
So the only thing you need to do is to assign this subscriber and add the email address to the group created for this purpose.
To do this, simply click the Assign button:
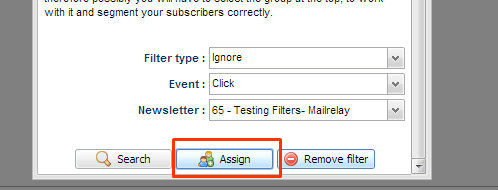
A new window will open with the information on how many subscribers will be assigned, and you can select the group:
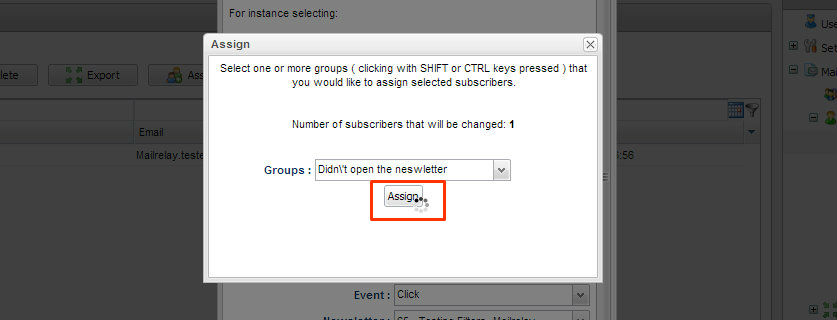
After clicking the Assign button, the system will display a message that the process was completed.
After you see the message above, you can click on the Remove Filter button, to close the advanced filter window.
Now you can send this newsletter again, but only for those subscribers who previously didn’t view the message:
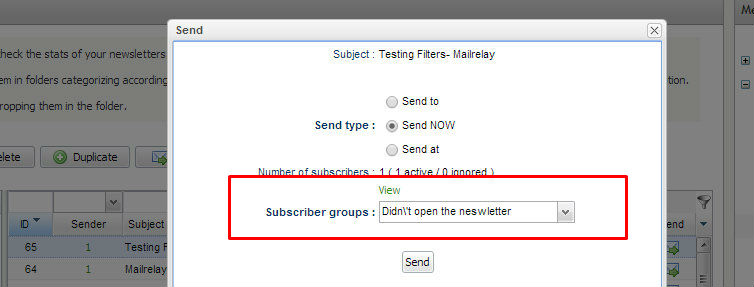
This is a very important process to segment your subscribers!
Multiple possibilities with advanced filters
You can send the newsletter again to users who didn’t open it, or send newsletters with related products and contents to subscribers who viewed the first campaign.
You can see all the users who clicked on the campaign and assign these subscribers to a group of active subscribers.
You can use this new feature to create targeted campaigns for your customers.
Start using it today!