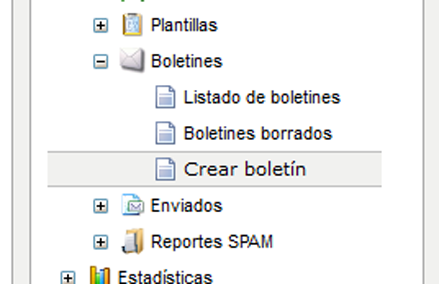
Another new feature introduced to Mailrelay recently is the ability to insert background images in tables. Previously, we had to be familiar with HTML in order to do this, but now we can do it directly from the editor tool. Let’s see an example, by going to our Mailrelay account and the “Create a newsletter” submenu under the “Newsletter” menu.

New Mailrelay editor features
We will define the values necessary to create our newsletter, such as the name, the account, and the groups it will be sent to, among others:

New Mailrelay editor features
Once we get to the Mailrelay newsletter editor, we will see a small table icon (marked in red in the image) on the right side of the editor. Let’s click on that button:

New Mailrelay editor features
By clicking on this icon, we will open a small window that looks like this:

New Mailrelay editor features
Here we can define the characteristics of our table, such as the number of rows and columns. Then we will click on the “Accept” button. The result will be a table that looks like this:

New Mailrelay editor features
As we can see, this is a table with three rows and three columns, just as we defined in the pop-up window. When creating email newsletters, using tables to develop the layout is often the most effective strategy, since email administrators are limited when using HTML and CSS.
We can add some example content to our newsletter table:

New Mailrelay editor features
If the page looks a little better to us now, imagine what it will look like when we add a background image to the first row. To do this—IMPORTANT—we will click the right mouse button in the empty cell in the first row, which will open a window:

New Mailrelay editor features
We will select “Cell” and then “Cell properties,” visible in the lower part of the submenu:

New Mailrelay editor features
We will click on this menu option and a new window will open in which we can define the values of each cell:

New Mailrelay editor features
Let’s set the most important values: the cell width, the cell height, and the background image we want. We have to keep in mind that background images do not “occupy” space, and therefore we must define the width and the height of the cell correctly in order for our background image to be visible.
Once we have defined this information, we will click the “See Server” button in the lower right part of the screen. This will take us to another window, where we can see the images that we have uploaded to our server. We saw an article previously on how to upload images:
https://blog.mailrelay.com/es/2012/04/19/insertar_boton_facebook_newsletter
So, all we need to do is click on the image that we wish to use:

New Mailrelay editor features
Once we have selected the image, click the “OK” button in the lower right part of the screen.

New Mailrelay editor features
Returning now to the previous screen, we can see that the value of the selected images has been inserted in the “Background Image” cell. We will accept the changes by clicking on “Accept.”

New Mailrelay editor features
The result, depending on the selected image, will look like this:

New Mailrelay editor features
Since it is a background image, we won’t have any trouble writing over it, just as we can see in this image:

New Mailrelay editor features
This will open up new possibilities when designing our newsletters, making it easier than doing it manually by editing code. Try it!
Ah, and if you don’t already have a Mailrelay account, you can create one for free (its always free and it never expires) and send up to 25,000 messages per month and have up to 5,000 subscribers.